TxSSC
K-12 Standard Reunification Method Toolkit
3.4 The Process in 6 Easy Steps
STEP 1
Greetings
As parents arrive at the reunification site, Greeters explain the process and distribute Reunification Cards.
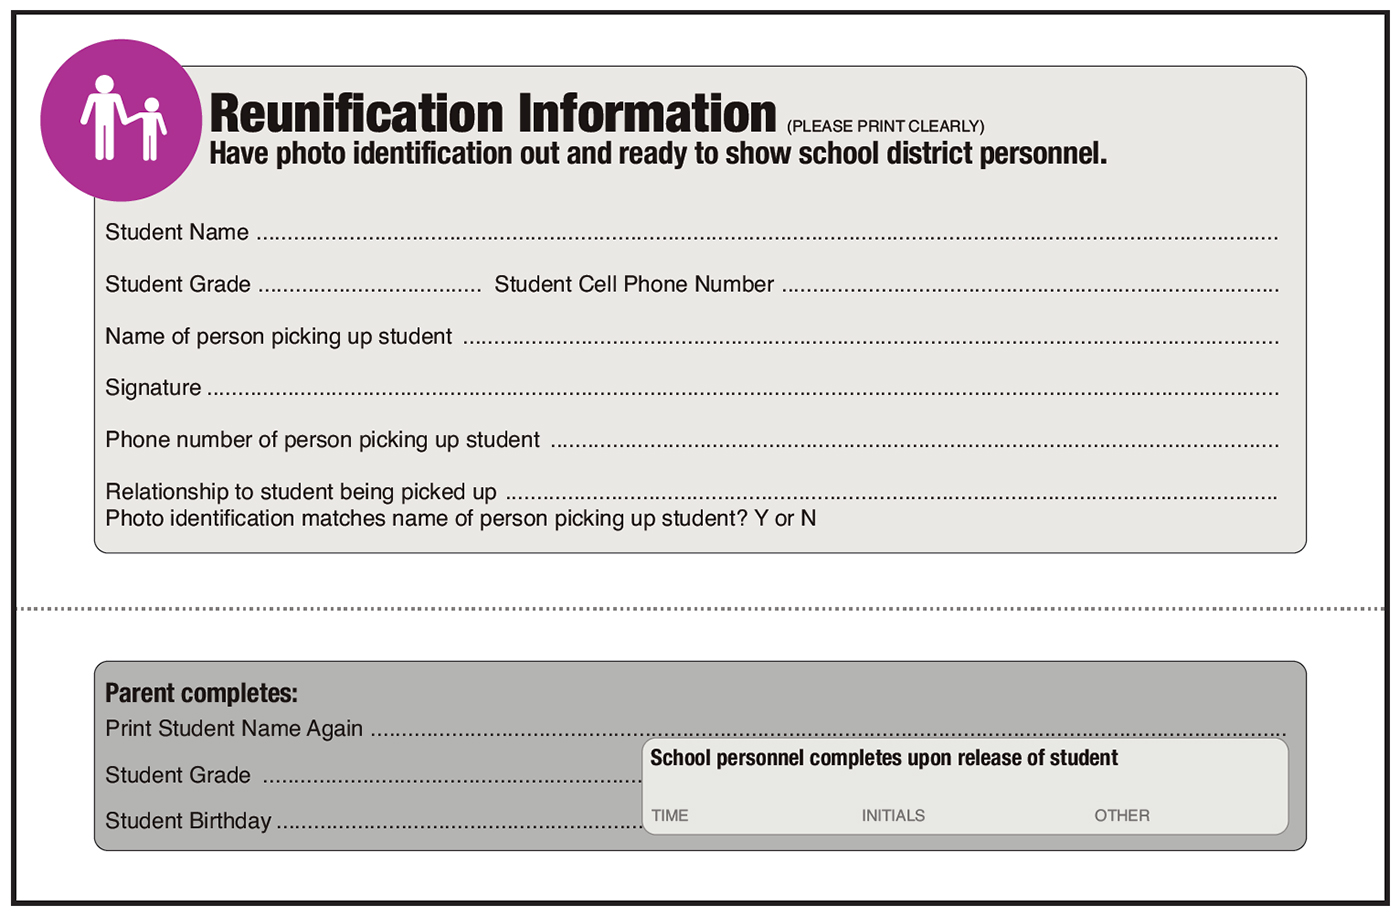
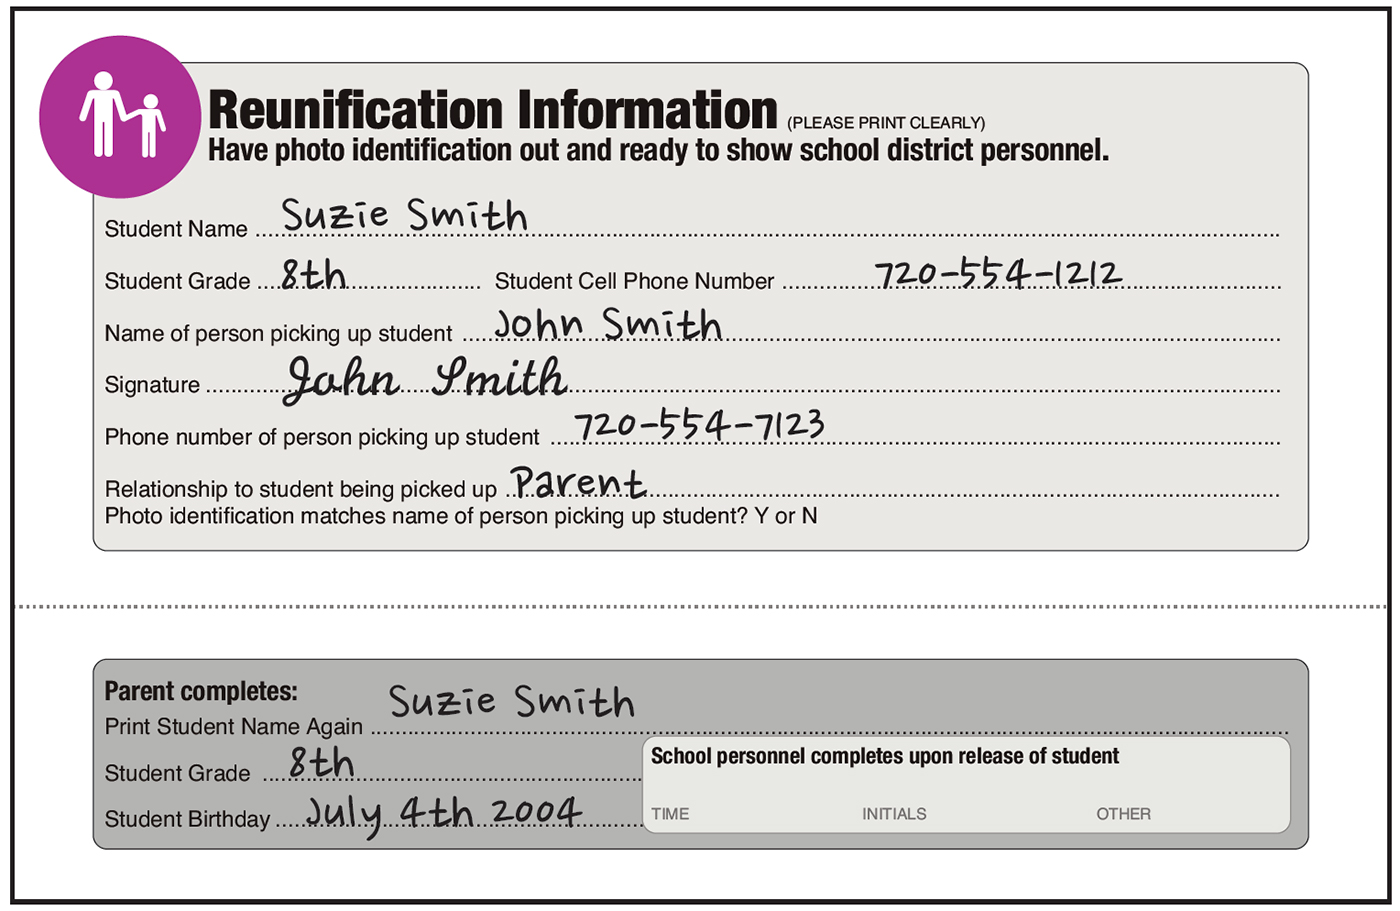
STEP 2
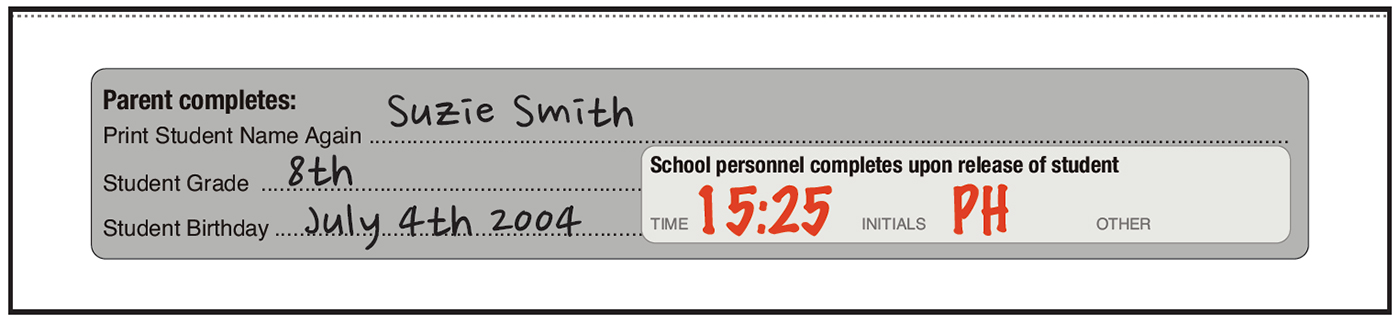
Parents Fill Out Card
Parents complete the information requested on the card, and begin to self-sort into lines.
STEP 3
Checkers Verify ID
Parent custody is verified. The card is torn on the perforation and the bottom is returned to the parent. The top is given to the Accountant.
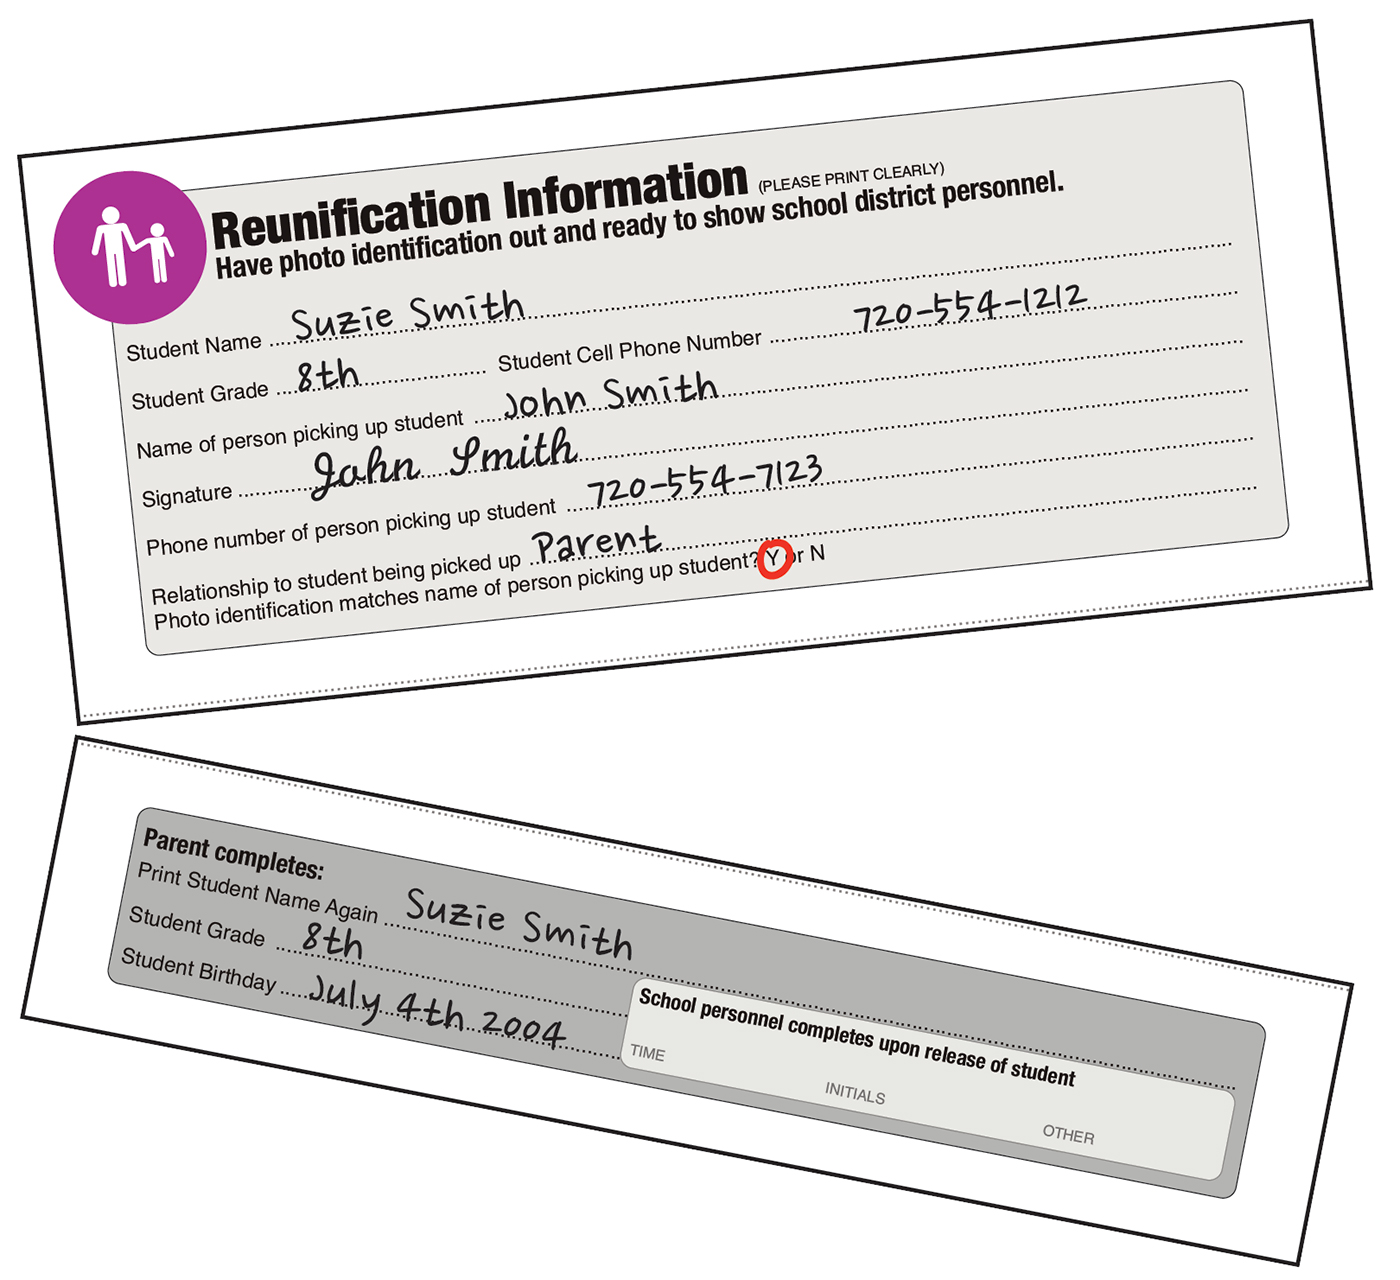

(Click above image to view/download full diagram.)
STEP 4
Reunification Area
At the Reunification Area, parents give the bottom of the card to a Reunifier. The Reunifier goes to the Assembly area to get the student.
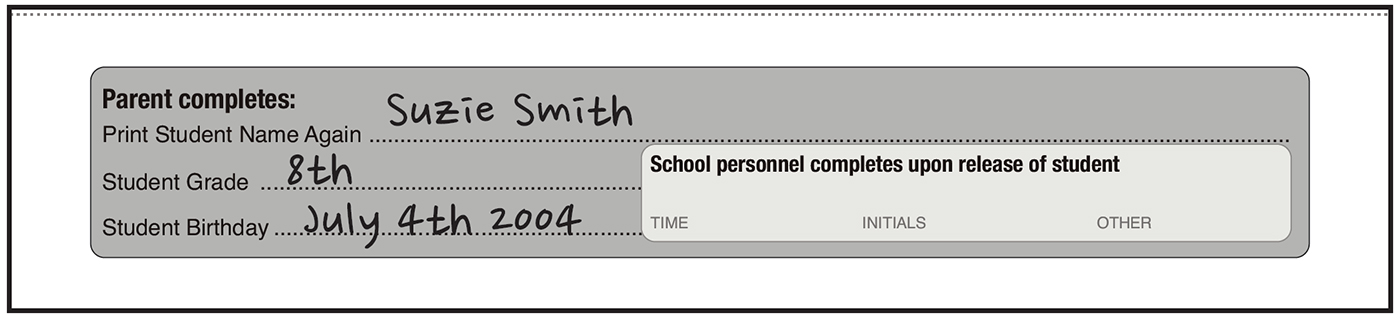
STEP 5
Student Reunification
The Reunifier returns the student to their parents asking the student if they feel comfortable leaving with that adult. They then note the time and initial the bottom of the card.
STEP 6
Accountability
The Reunifier delivers the bottom of the card to the Student Assembly Accountant. The Accountant may start sorting the cards.

(Click above image to view/download full diagram.)